 Save to Pinterest
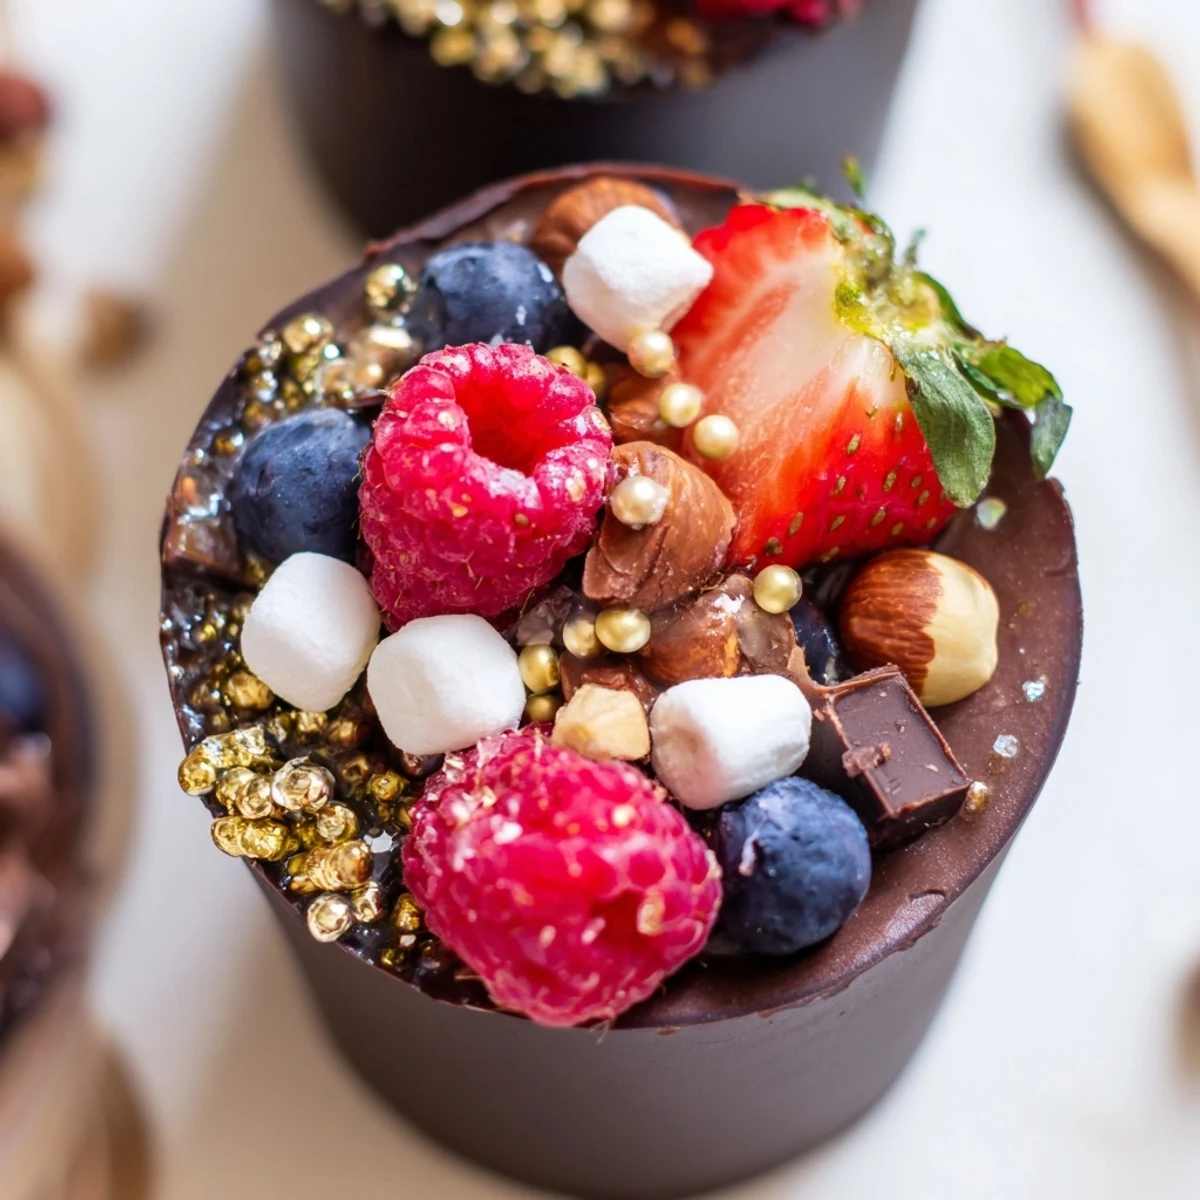
 These exquisite chocolate cups feature handcrafted dark chocolate vessels filled with silky chocolate mousse. Each cup is generously topped with fresh mixed berries, crunchy nuts, mini marshmallows, and delicate chocolate curls. The combination of velvety smooth mousse and crisp chocolate shell creates an irresistible texture contrast. Perfect for entertaining, these individual portions look stunning on dessert tables and offer guests a personalized sweet experience. The optional edible gold adds an extra touch of elegance for special celebrations.
The winter air was crisp when my sister announced she was hosting an elegant dinner party and wanted dessert cups that looked impressive but could be made ahead. I had never attempted chocolate cups before, but there is something thrilling about creating edible vessels. That first batch came out lopsided and fingerprint smudged, but the second attempt taught me everything about patience and technique. Now these chocolate grazing cups are my go to for moments when I want dessert to feel like a celebration.
Last summer I set up a grazing cup station at my best friends bridal shower, watching women who claimed they did not like sweets suddenly lining up for seconds. The bride herself held a cup in each hand, chocolate on her chin, laughing as she discovered the edible gold leaf on top. Something about individual portions makes people feel less guilty about indulging, and these cups disappeared faster than the wedding cake at the reception.
Ingredients
- 200 g dark chocolate: Choose at least 60 percent cocoa for the cups because higher cocoa content creates a sturdier shell that holds its shape beautifully at room temperature
- 200 ml heavy cream: Cold cream is absolutely non negotiable here, so pop your mixing bowl in the freezer for ten minutes before you start whipping
- 100 g dark chocolate: This gets melted into the mousse, so choose something you would eat straight from the bar since the flavor really shines through
- 2 tbsp powdered sugar: The cornstarch in powdered sugar helps stabilize the whipped cream, so do not substitute with granulated sugar
- 1 tsp vanilla extract: Pure vanilla makes all the difference in chocolate desserts, creating that professional pastry shop flavor
- 1 cup fresh mixed berries: Rinse and dry them completely, then keep them in the fridge until the last moment so they stay firm and bright
- 2 tbsp chopped nuts: Toast them lightly in a dry pan for two minutes to wake up their oils and intensify their crunch
- 2 tbsp mini marshmallows: These add whimsy and chew, plus they look adorable peeking out between the berries
- 2 tbsp chocolate curls: Use a vegetable peeler on a room temperature chocolate bar to create curls that actually hold their shape
- 1 tbsp edible gold leaf: This is entirely optional but transforms the cups from homemade dessert to catered luxury
Instructions
- Craft the chocolate cups:
- Melt the chocolate in thirty second bursts, stirring between each interval until it is glossy and smooth, then let it cool for a few minutes so it is not hot when you touch it to the liners
- Coat the liners:
- Working with one liner at a time, brush melted chocolate up the sides using upward strokes, creating a layer thick enough that you cannot see through it but thin enough to break beautifully when bitten
- Chill until set:
- Place the liners on a baking sheet and refrigerate for at least twenty minutes, checking that the chocolate looks matte and firm before attempting to remove the liners
- Unveil the cups:
- Peel away the liners starting from the top edge, working slowly to avoid cracking your handiwork, then arrange the empty cups on your serving tray
- Prepare the mousse base:
- Melt the remaining chocolate until it is completely smooth, then set it aside to cool while you whip the cream
- Whip the cream:
- Beat the cold cream with powdered sugar and vanilla until soft peaks form, which means the cream should hold its shape but still droop gently from the whisk
- Combine and fold:
- Stir a dollop of whipped cream into the melted chocolate to lighten it, then gently fold the chocolate mixture back into the remaining cream until no white streaks remain
- Fill the cups:
- Spoon or pipe the mousse into each chocolate cup, stopping about two thirds up the sides to leave room for your toppings
- Garnish generously:
- Arrange berries, nuts, marshmallows, and chocolate curls on top of each cup, adding the gold leaf last as the crowning touch
- Final chill:
- Refrigerate the assembled cups for at least twenty minutes so the mousse sets and the flavors meld together
 Save to Pinterest
 My daughter helped me make a batch for her ninth birthday party, her small hands carefully placing each berry with the concentration of a surgeon. The kids went quiet for the first time all afternoon, every single cup returned to the kitchen completely empty. That night she asked if we could make them every weekend, and I realized the real gift was not the dessert itself but the pride she felt creating something so beautiful.
Making Ahead Like A Pro
Prepare the chocolate cups and mousse separately up to twenty four hours in advance, storing the cups at room temperature in a cool spot and the mousse covered in the refrigerator. Assemble everything just before serving to maintain that perfect contrast between the crisp chocolate shell and the silky mousse interior.
Flavor Variations That Work
Swap half the dark chocolate for milk chocolate if you are serving a crowd with a sweet tooth, or use white chocolate for the mousse while keeping dark chocolate cups for stunning visual contrast. A tablespoon of instant espresso dissolved in the melted chocolate creates a mocha version that pairs exceptionally well with the fresh berries.
Presentation Secrets
Arrange the finished cups on a mirrored tray or a large platter lined with fresh mint leaves and additional berries to create a dessert table centerpiece. The visual impact of multiple cups gleaming under restaurant lighting makes even simple gatherings feel like special occasions.
- Work in a cool room or run your hands under cold water periodically if the chocolate starts melting from your body heat
- Keep the finished cups away from direct sunlight or warm windows until serving time
- Have a few extra liners ready in case any cups crack during assembly
 Save to Pinterest
 There is something deeply satisfying about watching someone lift a chocolate cup to their mouth, their eyes widening as they realize the entire thing is edible. These grazing cups turn dessert into an experience, a moment of pure indulgence that lingers in memory long after the last crumb disappears.
Questions & Answers
- → Can I make these chocolate cups ahead of time?
-
Yes, prepare the chocolate cups and mousse up to 24 hours in advance. Store cups in an airtight container in the refrigerator. Add fresh toppings just before serving to maintain texture and appearance.
- → What other toppings work well with these cups?
-
Try crushed cookies, caramelized nuts, fresh mint leaves, shaved coconut, or crushed pretzels for salty contrast. Seasonal fruits like poached pears or caramelized apples also work beautifully.
- → How do I prevent the chocolate cups from cracking?
-
Ensure your chocolate is properly tempered and the coating is thick enough. Work in a cool room and avoid sudden temperature changes. If using paper liners, peel them off carefully once completely set.
- → Can I use milk or white chocolate instead?
-
Absolutely. Milk chocolate creates a sweeter, creamier profile while white chocolate offers a delicate vanilla flavor. Adjust powdered sugar in the mousse accordingly to balance sweetness levels.
- → What's the best way to melt chocolate for these cups?
-
Use a double boiler for gentle, even heating, or microwave in 30-second intervals stirring between each. Avoid overheating as this can cause seizing and affect the final texture of your cups.
- → How long will the assembled cups stay fresh?
-
Best enjoyed within 4-6 hours of assembly to prevent the chocolate from becoming soft and toppings from losing crunch. The chocolate shells and mousse can be prepared separately and stored for up to 3 days.