 Save to Pinterest
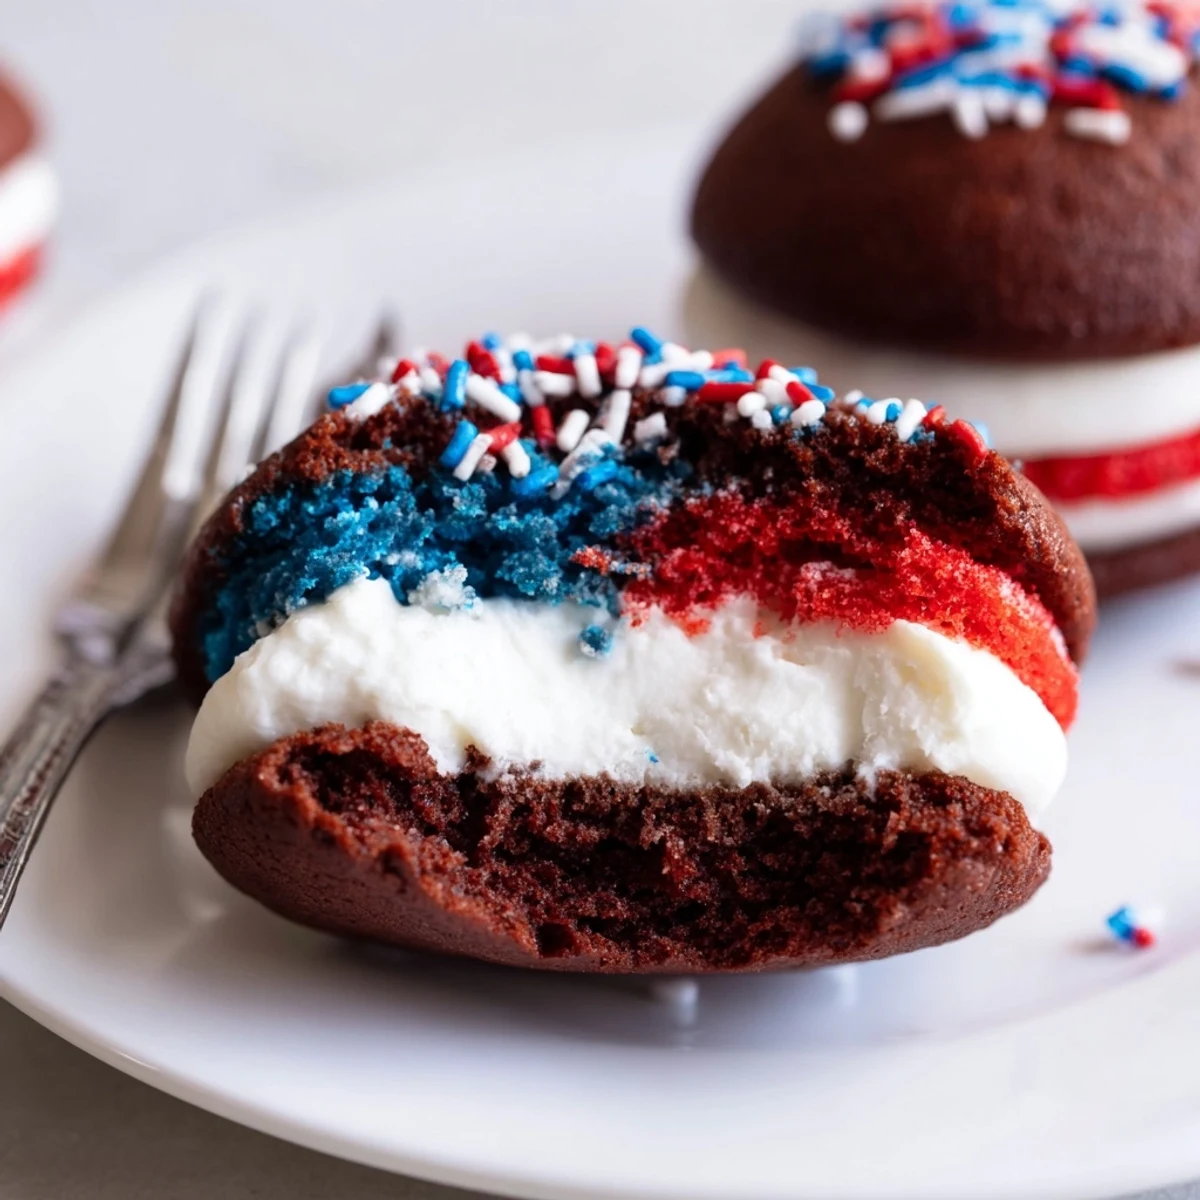
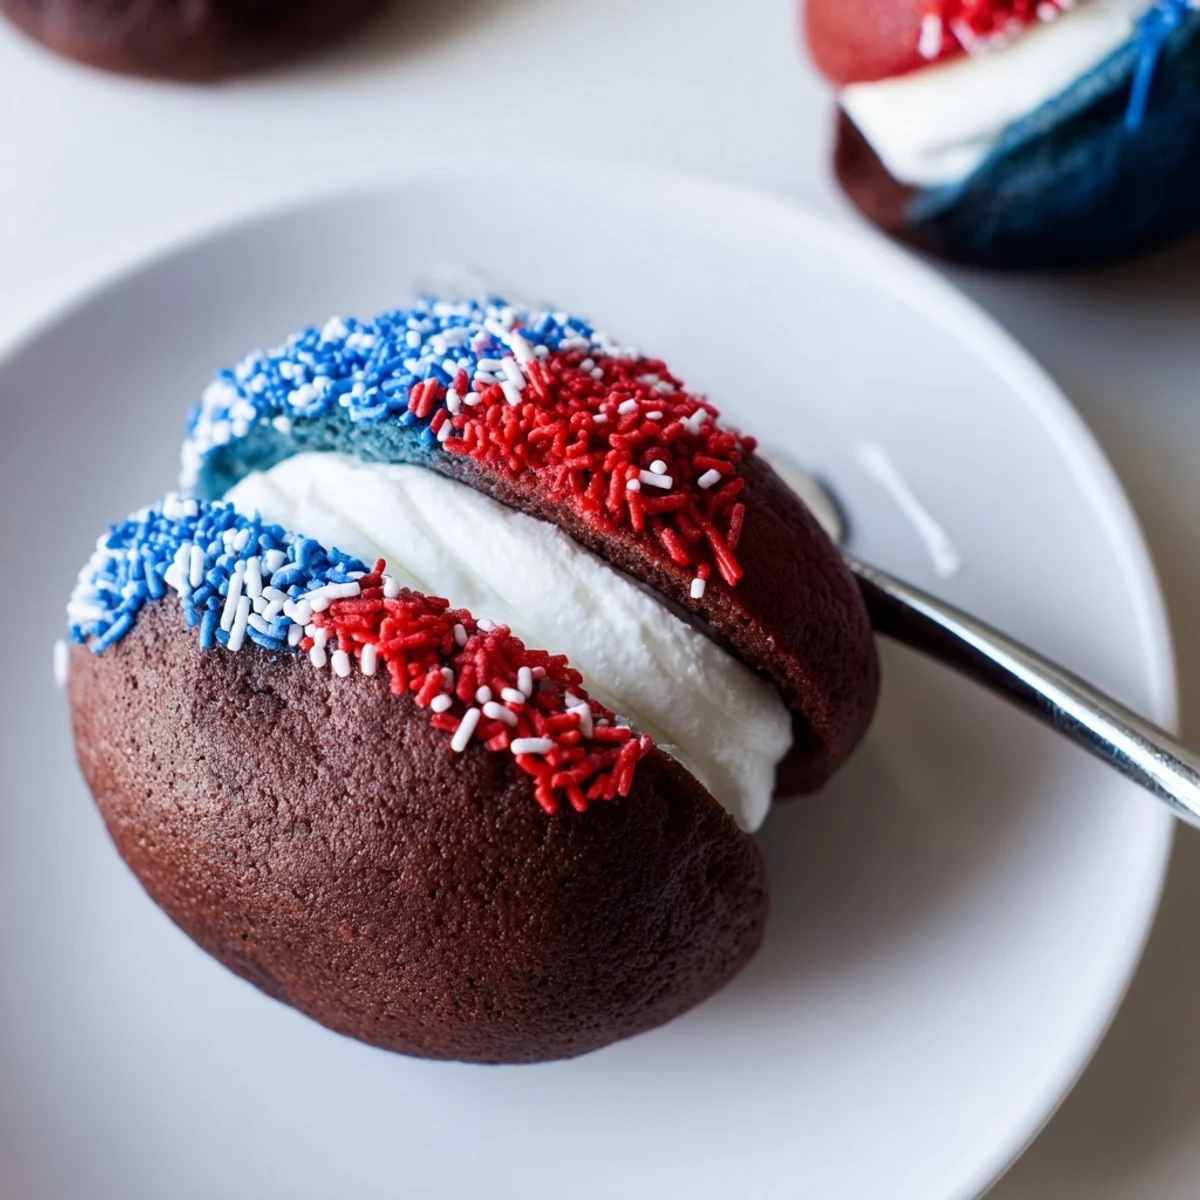
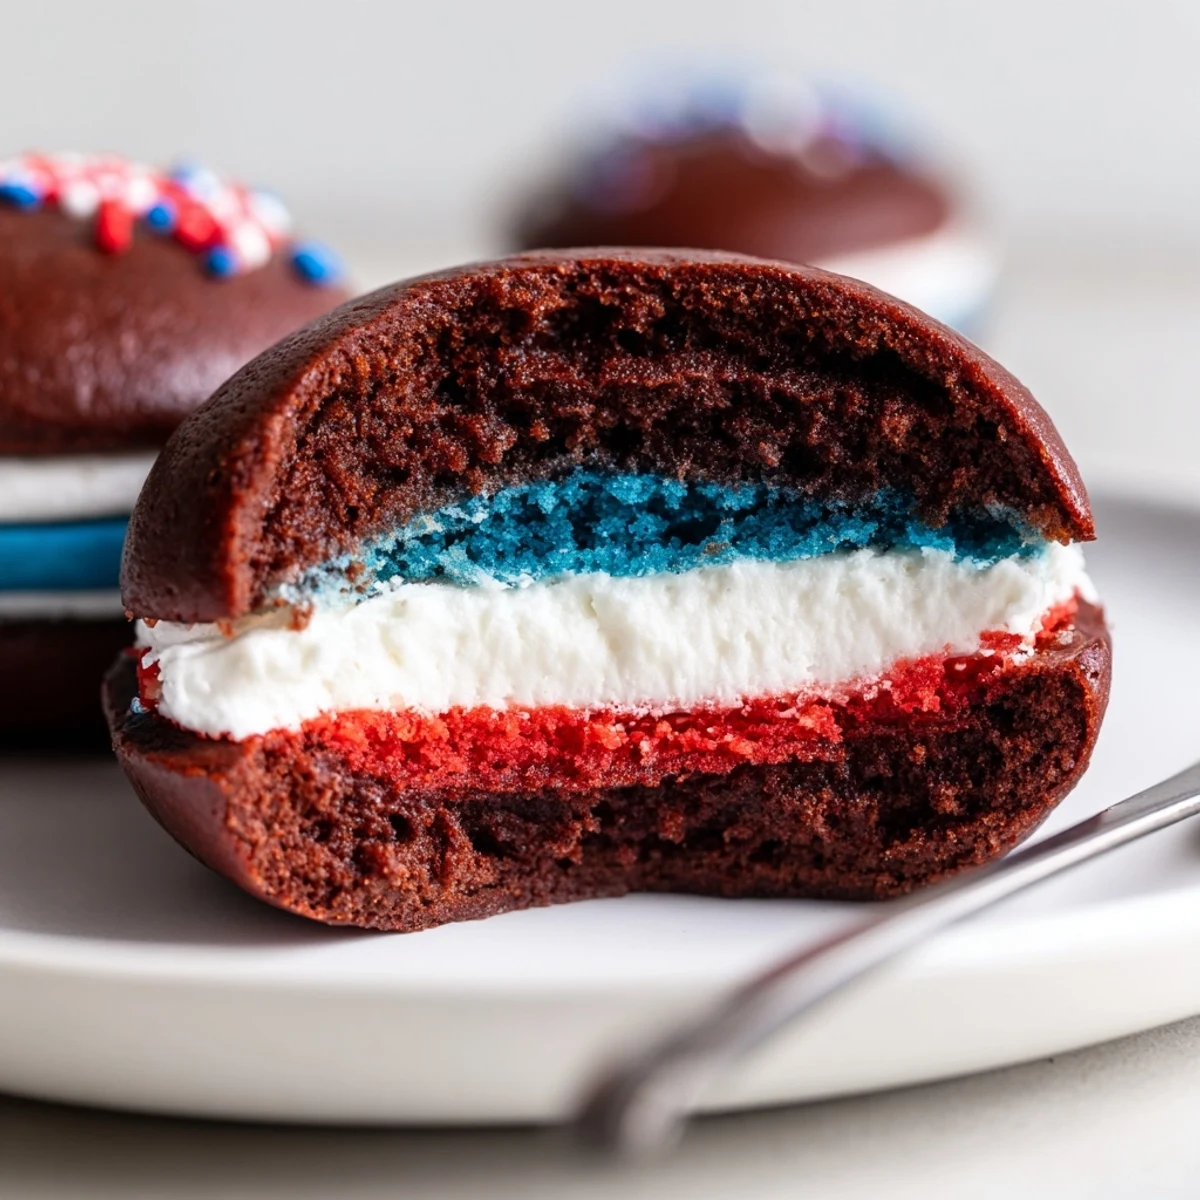
 Soft cocoa whoopie cakes are made by creaming butter and sugar, adding egg, buttermilk and dry ingredients, then scooping 24 rounds and baking 10–12 minutes until springy. The filling blends butter, powdered sugar and marshmallow creme; divide and tint red and blue. Sandwich cakes, roll edges in sprinkles and chill 30 minutes for easier handling. Use gel color for vivid shades and swap gluten-free flour or dairy-free substitutes as needed.
The first time festive whoopie pies made an entrance in my kitchen, my playlist was blaring summer anthems and my counter was scattered with faint trails of colored sugar. I wasn't aiming for perfection—just frosted smiles and sticky fingers to ring in the long weekend. For a minute, the soft aroma of chocolate mingled with the distinct tang of buttermilk, and even the mess seemed to fit the mood. Somehow, these cheerful sandwiches always bring a playful kind of energy no matter what flag you're waving.
One July afternoon, with neighbors dropping by for an impromptu barbecue, I whipped out a tray of these whoopie pies and immediately became the most popular house on the block. The sprinkles scattered everywhere, but no one seemed to care when the cookies disappeared almost as quickly as I set them down.
Ingredients
- All-purpose flour: Use spoon-and-level for the fluffiest cakes and don't overmix, which I learned after a batch baked harder than I'd planned.
- Unsweetened cocoa powder: Dutch-process gives a richer color—try not to inhale the cloud when whisking.
- Baking soda: Makes the cakes rise and turn pillowy soft, a detail you can't skip.
- Salt: Balances the sweetness, so don't forget even a pinch.
- Granulated sugar: Cream it into the butter till it's light—rushing this step loses that iconic texture.
- Unsalted butter: Room temperature butter is a baker's best friend, for both cakes and filling.
- Egg: Creates a soft crumb; make sure it's at room temp for easy blending.
- Buttermilk: Adds tang and keeps the cakes ultra moist; don't be tempted by regular milk.
- Vanilla extract: Brightens both the cake and the filling—real vanilla sings above imitation.
- Powdered sugar: Sifting avoids lumps, which makes your filling fluffy instead of gritty.
- Marshmallow creme: The secret to that uniquely sticky, creamy center everyone grabs for first.
- Red & blue food coloring: Use gel for bold colors that won't water down your frosting.
- Patriotic sprinkles: Roll the edges or scatter with abandon; it's all about celebrating.
Instructions
- Preheat & Prep:
- Set your oven to 350°F and line baking sheets with parchment—crinkly edges just make it homey.
- Mix Dry Ingredients:
- Whisk flour, cocoa, baking soda, and salt in a bowl, taking in that deep cocoa scent as you go.
- Cream Butter & Sugar:
- Beat butter and sugar until airy and pale; this is where your whoopie pies start to get their signature melt-in-mouth texture.
- Blend Wet Ingredients:
- Add egg till just mixed, then blend in buttermilk and vanilla—don't worry if it looks a bit curdled at first.
- Combine Mixtures:
- Gradually stir dry mix into the wet, using gentle turns so the batter stays soft and thick.
- Scoop & Bake:
- Drop batter in even rounds, spaced out for spreading, and bake until they spring back to a gentle touch—usually about 10–12 minutes.
- Make Filling:
- Beat butter till creamy, then whip in powdered sugar, marshmallow creme, vanilla, and salt until it's cloudlike.
- Color the Filling:
- Divide filling in thirds, swirling in red and blue coloring for two, and leave one bowl white—those brights really pop.
- Assemble Sandwiches:
- Spread or pipe colored filling onto half the cakes, sandwich with the others, and gently press to set.
- Decorate with Flair:
- Roll the sides in red, white, and blue sprinkles, or let kids go wild piping extra colors on top.
 Save to Pinterest
 The night before the Fourth, I snuck a leftover whoopie pie for a midnight snack, and realized how much they'd brightened up the table and the day—sometimes the smallest desserts steal the show.
Celebrating With Color
Coloring the filling feels more like art class than baking and there's an odd satisfaction in watching the colors swirl and settle just right. Gel coloring is everything here; a few drops go a long way and don't leave the filling runny.
Making Whoopie Pies Kid-Friendly
Whoopie pies are forgiving for enthusiastic small helpers, especially when it comes to sandwich assembly and blasting everything with sprinkles. Keep an extra wet towel on hand—I promise, you'll use it.
What to Do With Leftovers
Stash extras in the fridge, layered with parchment, and they stay soft for days—if people don't eat them all in a single afternoon.
- Let them come to room temp before serving for ideal softness
- Freeze for up to a month if you somehow have any left
- Sprinkle more decorations just before serving for maximum festivity
 Save to Pinterest
 If you end up with colored sugar on your face and sprinkles on the floor, you're making these the right way. Happy celebrating, wherever you serve them.
Questions & Answers
- → How do I keep the cakes soft?
-
Avoid overbaking—remove when the tops spring back lightly. Use buttermilk for tenderness and cream the butter and sugar until light for a softer crumb. Cool completely on a rack before filling to preserve texture.
- → Can these be made ahead and stored?
-
Yes. Assemble and chill for 30 minutes to firm the filling, then store in an airtight container in the fridge up to 3 days. Bring to room temperature for 20–30 minutes before serving for best texture.
- → What swaps work for gluten-free or vegan needs?
-
Use a 1:1 gluten-free flour blend for the cakes. For vegan versions, choose plant-based butter and a vegan marshmallow fluff or stabilized aquafaba-based filling; use non-dairy milk in place of buttermilk with a splash of vinegar.
- → How can I get bright red and blue colors without affecting texture?
-
Use high-quality gel or paste food coloring; they add intense color with minimal liquid. Add small amounts, mix thoroughly, and adjust gradually to reach the desired shade.
- → My filling is too runny—how do I fix it?
-
Whip in more powdered sugar a little at a time to thicken, or chill the filling to firm it. If needed, increase the butter proportion slightly for stability and re-whip until light and pipeable.
- → Why did some cakes crack or sink?
-
Overmixing the batter can develop gluten and cause toughness or sinking. Scoop evenly and space pans for air circulation. Bake at the correct temperature and remove as soon as the surface is set.