 Save to Pinterest
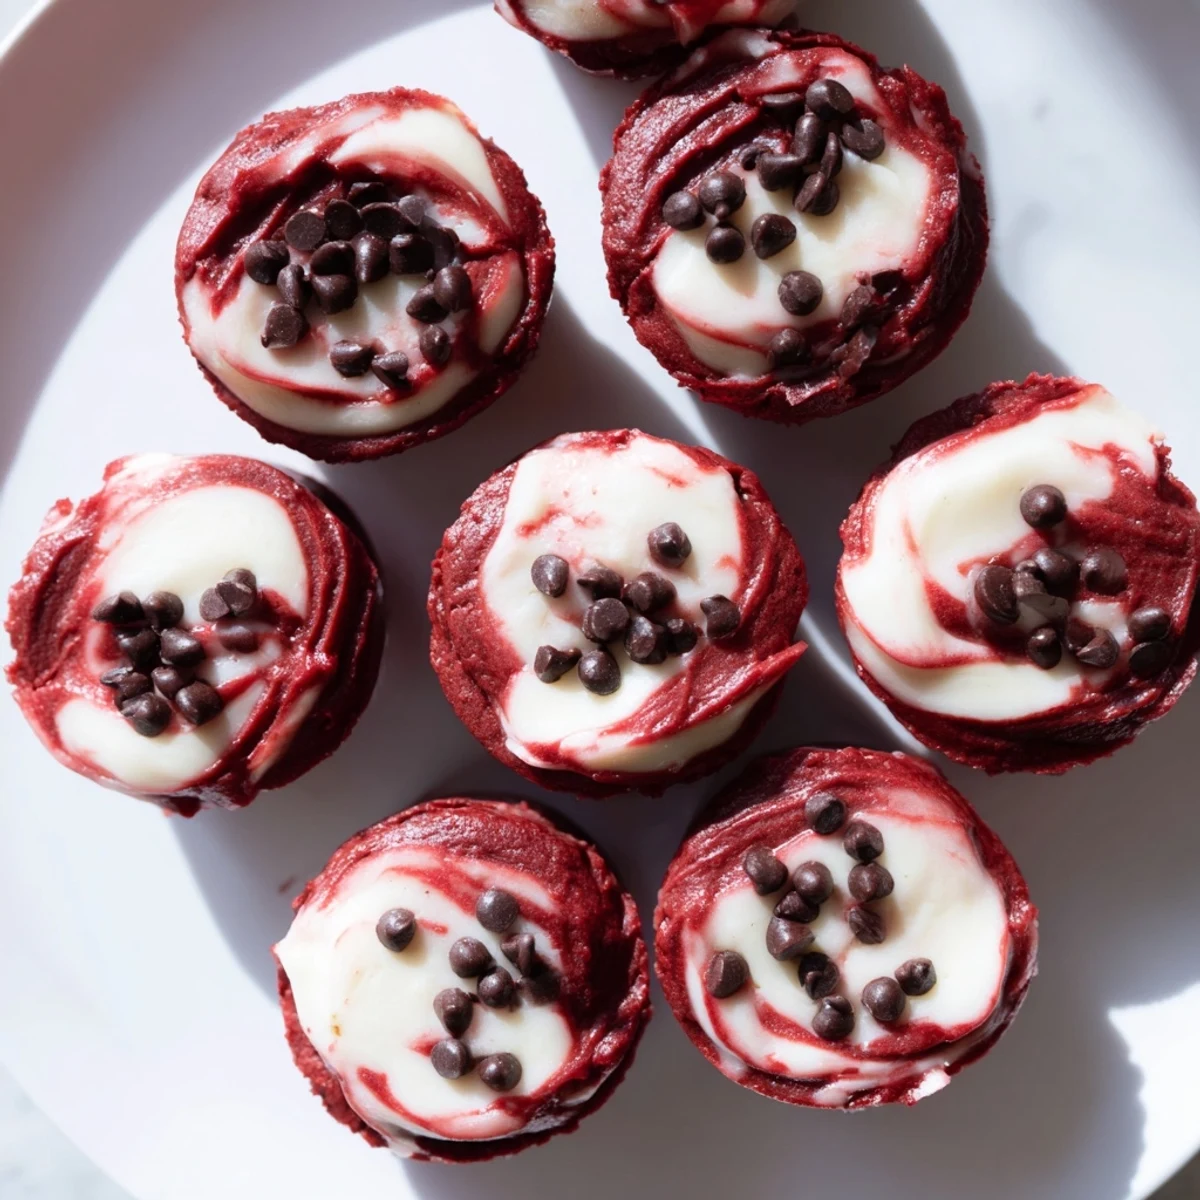
 These red velvet cheesecake bites combine moist, cocoa-infused brownie bases with a smooth cheesecake swirl. The batter is gently blended and baked in mini cups, creating a marbled effect that’s both visually appealing and delicious. Ready in under an hour, these treats are perfect for sharing at parties or as a special dessert. Store chilled to keep their creamy texture.
The first time I made these, my roommate walked into the kitchen and immediately asked if I'd gone mad. There was red batter everywhere, I was furiously swirling cheesecake into tiny muffin cups, and I may have been wearing an apron over my pajamas at 3 PM. But when those little marbled beauties came out of the oven, all judgment vanished. Something about that velvety crumb meets tangy cream cheese that makes people forgive a lot of kitchen chaos.
I brought a batch to my office holiday party last year, and honestly, I thought they'd get lost among all the elaborate cookies and elaborate cakes. But people kept asking who made the 'little red things.' My boss's wife actually messaged me later that night for the recipe. There's something about the combination of fudgy brownie and creamy cheesecake that works at absolutely any gathering, from book clubs to birthdays.
Ingredients
- Unsalted butter (melted): Melting it first makes for a denser, fudgier brownie that pairs perfectly with the light cheesecake layer
- Granulated sugar: The sugar does double duty here, sweetening both the brownie base and providing structure for the crumb
- Large eggs: Room temperature eggs blend more smoothly into the batter, avoiding those tiny white specks you sometimes get
- Vanilla extract: Don't skimp here—vanilla is what bridges the chocolate and cheesecake flavors together
- Red food coloring: Gel coloring gives you that vibrant red with less liquid, which can throw off the batter's consistency
- All-purpose flour: Sifting the flour first prevents clumps and ensures an even, tender crumb throughout
- Unsweetened cocoa powder: Dutch-processed cocoa gives a deeper, smoother chocolate flavor than natural cocoa
- Salt: Just enough to make the chocolate taste more like itself—never skip salt in chocolate desserts
- Cream cheese (softened): Really let it come to room temperature, or you'll end up with lumpy cheesecake swirls
- Egg yolk: Using just the yolk makes the cheesecake layer richer and creamier without making it too loose
Instructions
- Get your space ready:
- Preheat your oven to 350°F and line that mini muffin tin with liners. I promise liners are worth it here—these stick like nobody's business without them.
- Mix the brownie batter:
- Whisk the melted butter and sugar until they're actually friends, then beat in the eggs, vanilla, and red food coloring until everything is uniformly shocking pink.
- Add the dry ingredients:
- Sift in the flour, cocoa, and salt, then fold until just combined. The batter will be thick—this is normal and correct.
- Fill your muffin cups:
- Divide the red velvet batter among the cups, filling each about two-thirds full. An ice cream scoop or cookie scoop makes this so much less messy.
- Make the cheesecake swirl:
- Beat that softened cream cheese until it's smooth, then add the sugar, egg yolk, and vanilla. Keep going until it's silky—no lumps allowed.
- Swirl it all together:
- Drop a small spoonful of cheesecake mixture onto each brownie cup, then use a toothpick to gently marble it in. Don't overthink it—imperfect swirls look more rustic and charming anyway.
- Bake until just set:
- Pop them in for 22 to 25 minutes. You want them set but still slightly fudgy—a toothpick should come out with moist crumbs, not bone dry.
- Let them cool completely:
- Cool in the pan for 10 minutes, then transfer to a wire rack. They need to be fully cool before you serve them, or the cheesecake layer won't set properly.
 Save to Pinterest
 My niece helped me make these for her class Valentine's party, and she took her swirling job very seriously. Each bite had to be 'just right,' according to her seven-year-old standards. The best part was watching her classmates' faces when they bit into something that looked like chocolate but had this surprise creamy layer. Sometimes food magic is just simple ingredients combined with a little patience.
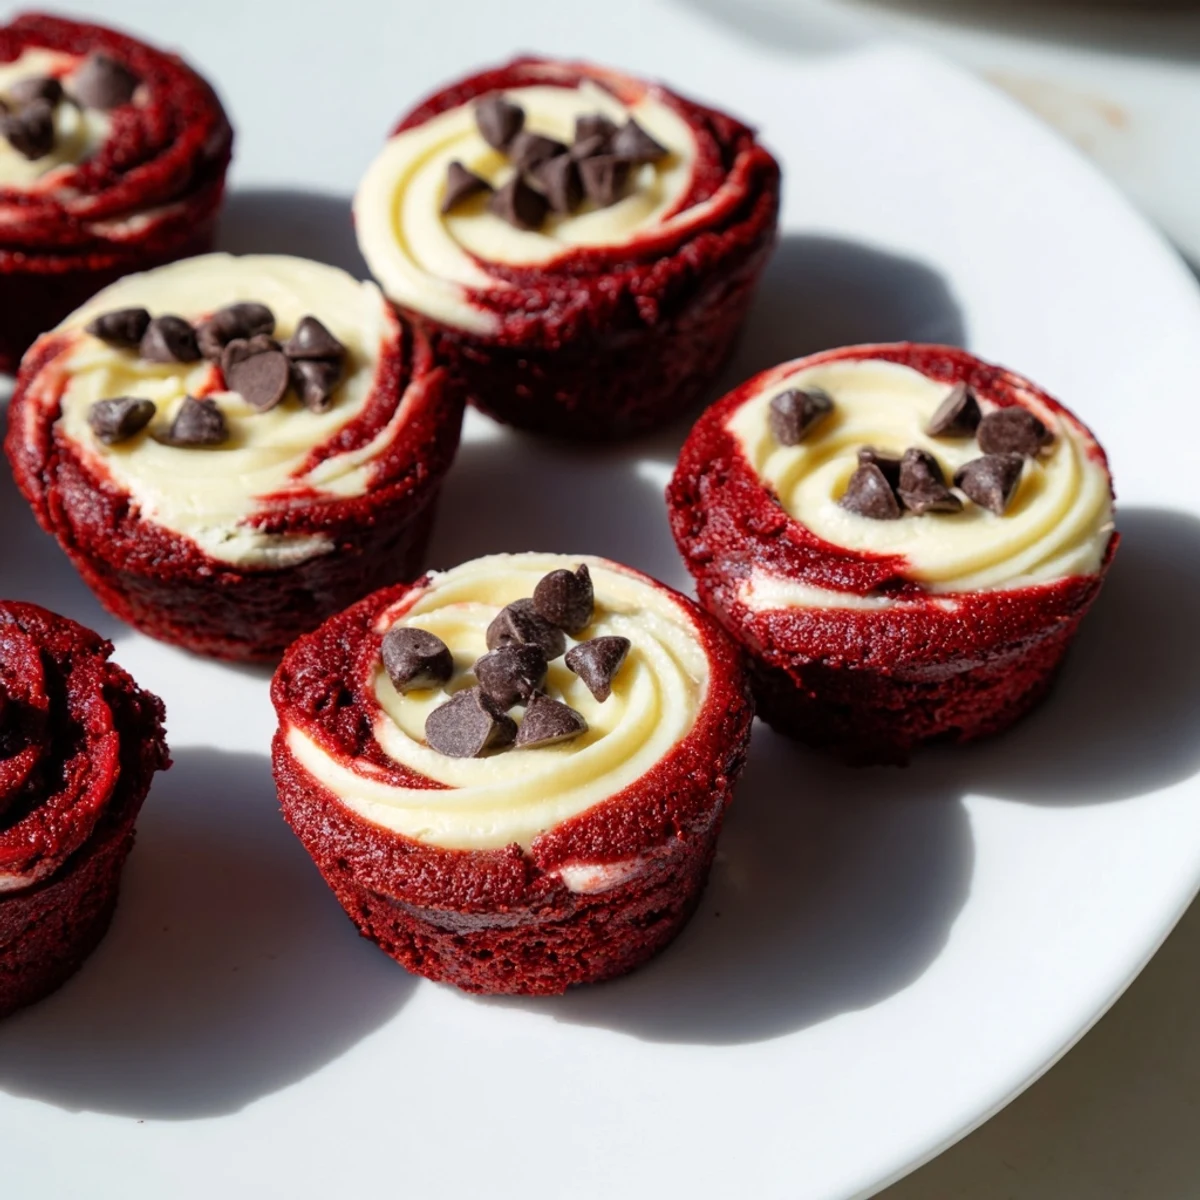
Getting That Perfect Swirl
The trick to a good marble is dropping the cheesecake mixture in small dollops, not spreading it. Then use your toothpick to make just two or three figure-eights through each cup. I used to go wild with the swirling and ended up with uniformly pink batter, which tasted fine but missed the whole point of the marbled look. Less is more here—let the contrast do the work.
Making Them Ahead
These actually taste better after a night in the refrigerator. The flavors settle into each other, and the texture becomes more fudgy. I make them the day before parties now, and nobody has complained yet. Just keep them covered so they don't absorb any fridge smells. Room temperature is best for serving, so take them out about 30 minutes before guests arrive.
Customization Ideas
Mini white chocolate chips pressed into the top before baking add these little pockets of sweetness throughout. I've also swapped the red coloring for other colors depending on the occasion—pastel for Easter, orange for Halloween, green for Christmas. The base is neutral enough that you can really make these your own.
- Sprinkle sea salt over half the batch for a sweet-salty version that adults go crazy for
- Add a teaspoon of espresso powder to the brownie batter to deepen the chocolate flavor
- Crush some graham crackers over the cheesecake layer before swirling for a cheesecake crust vibe
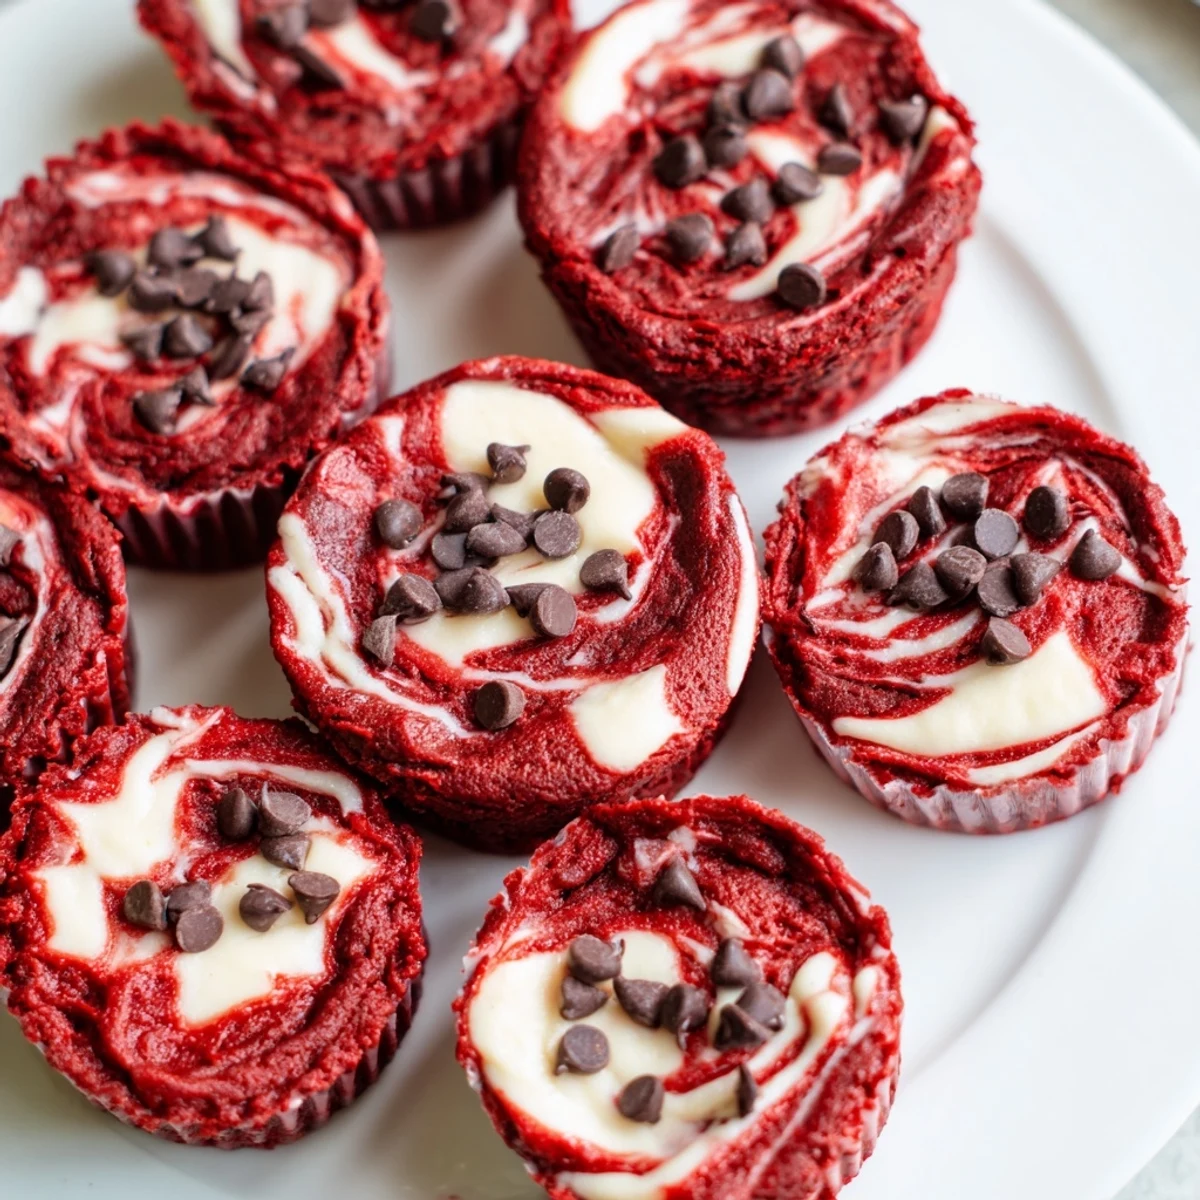 Save to Pinterest
 There's something genuinely satisfying about bite-sized desserts, especially ones that look this impressive. Whether you're feeding a crowd or just treating yourself to something small and special, these little red velvet bites never fail to make people smile.
Questions & Answers
- → How do I achieve the marbled cheesecake swirl?
-
Spoon the cheesecake mixture onto the brownie batter then gently swirl it using a toothpick or skewer before baking for a marbled effect.
- → Can I prepare these ahead of time?
-
Yes, these bites can be refrigerated for up to 5 days or frozen for two months to keep their freshness.
- → What type of pan is recommended?
-
A 24-cup mini muffin tin works best to create uniform, bite-sized portions.
- → Are these bites suitable for vegetarians?
-
Yes, they contain dairy and eggs but no meat, aligning with vegetarian dietary preferences.
- → Can I add toppings before baking?
-
Sprinkling mini chocolate chips or colored sanding sugar on top before baking adds festive texture and flavor.