 Save to Pinterest
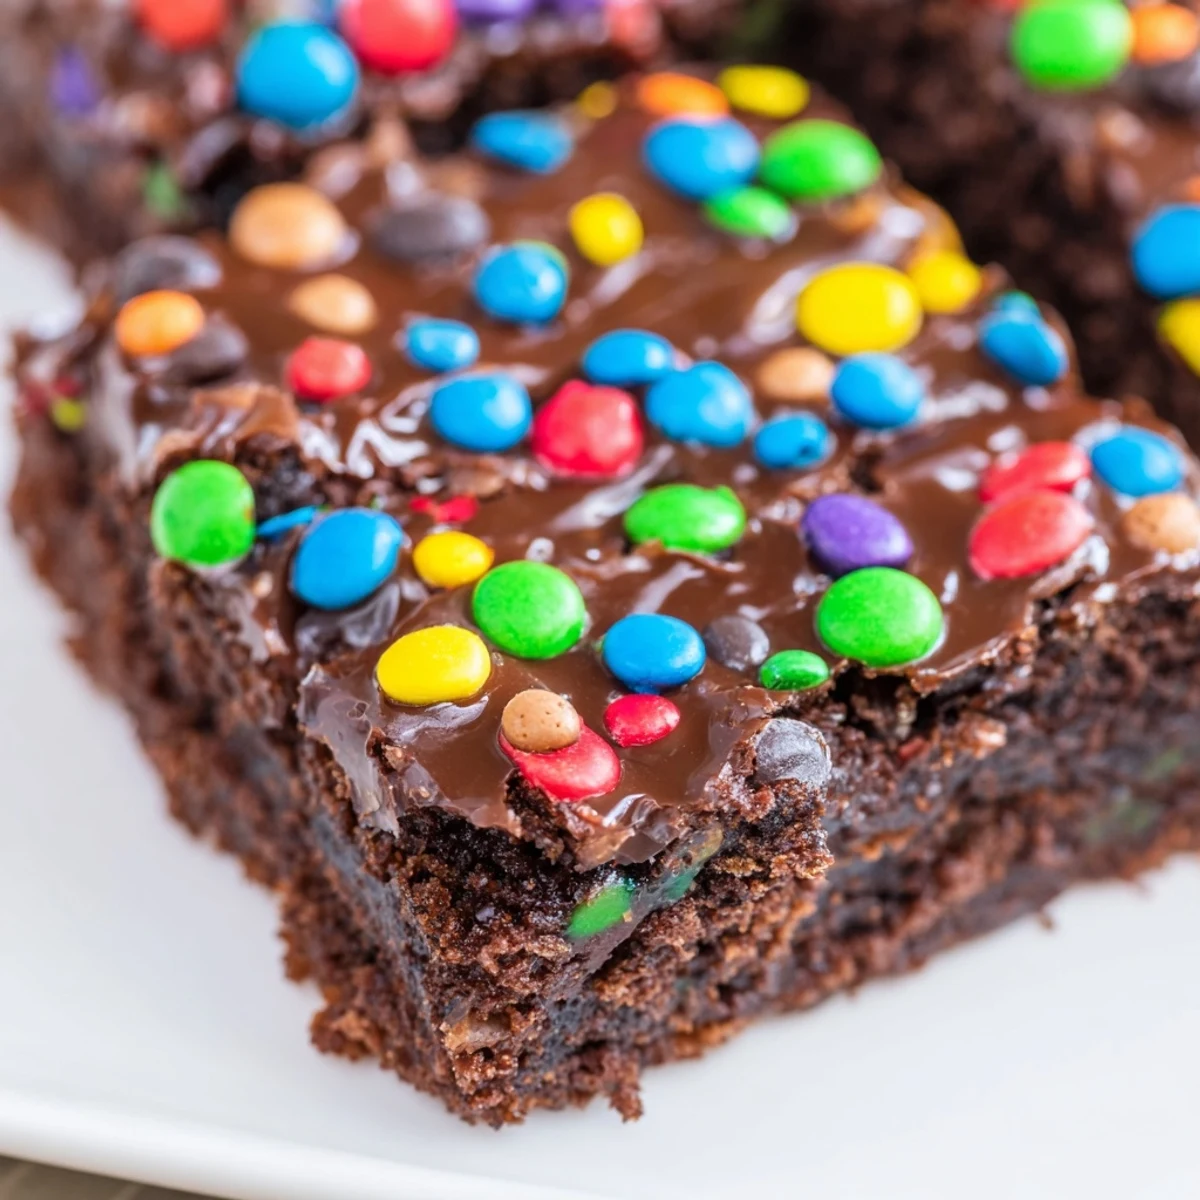
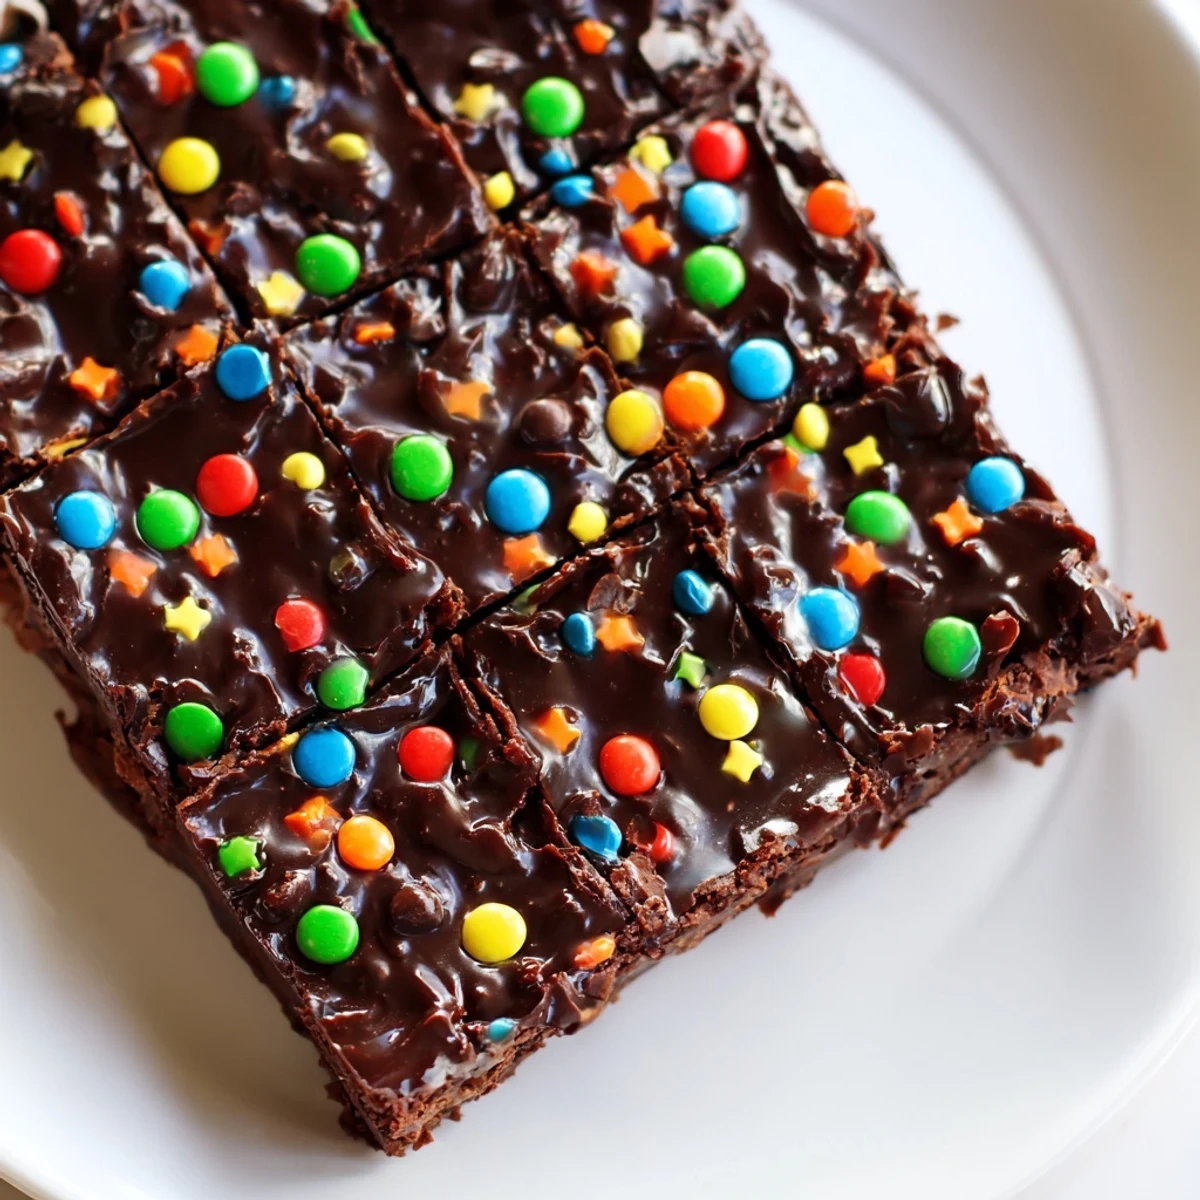
 These fudgy brownie bars begin with melted butter, blended sugars, eggs and vanilla, then sifted cocoa, flour and salt folded in gently. Bake until the center is just set, cool fully, then coat with a silky ganache made from semi‑sweet chocolate and hot cream. Top with candy sprinkles, chill to set, slice into 12 even bars. Tip: avoid overmixing for a tender crumb.
The grocery store checkout line is where it started. I spotted a box of cosmic brownies on the rack and grabbed them without thinking, driven by some deep muscle memory from third grade lunchboxes. They were gone before I pulled into my driveway, and I sat there in the parking lot of my apartment complex feeling both satisfied and mildly embarrassed. That evening I decided to make a version worth not being embarrassed about.
My friend Marcus stopped by unannounced the second time I made these, right as I was pressing candy sprinkles into warm ganache. He stood in the kitchen doorway with his coat still on, watching, and said nothing for a full ten seconds before asking how many he was allowed to take. I told him two and he took four.
Ingredients
- Unsalted butter (170 g, melted): The foundation of that chewy fudgy texture, and melting it means no creaming step, so the batter comes together fast.
- Granulated sugar (200 g): Gives the brownies structure and that classic crackled top when baked at the right temperature.
- Light brown sugar (110 g, packed): Adds moisture and a faint caramel depth that plain white sugar cannot achieve on its own.
- Large eggs (2 whole, plus 1 yolk): The extra yolk is the secret weapon here, it makes the interior richer without making them cakey.
- Pure vanilla extract (2 tsp): Rounds out the chocolate and sugar, and a full two teaspoons is not too much, it is exactly right.
- Unsweetened cocoa powder (80 g): Use a decent quality one, the cocoa is carrying a lot of the flavor so it matters more than you think.
- All purpose flour (125 g): Measured by weight if possible, because even a small overpour can push these toward cake territory.
- Salt (1/4 tsp): Just enough to make the chocolate taste like itself.
- Semi sweet chocolate (170 g, finely chopped): The ganache depends entirely on this, so use something you would eat on its own.
- Heavy cream (120 ml): Heated just to a simmer, never boiling, or the ganache can seize and turn grainy.
- Unsalted butter for ganache (15 g): A small addition that gives the ganache a velvety finish and a slight sheen after chilling.
- Candy coated chocolate chips or rainbow sprinkles (60 g): The cosmic element, use the bright colorful ones because part of this recipe is about joy.
Instructions
- Prep the pan and oven:
- Heat your oven to 175 degrees C (350 degrees F) and line an 8x8 inch pan with parchment, leaving the sides hanging over like handles. This saves you later when you need to lift the whole slab out cleanly.
- Build the sugar and butter base:
- Pour the melted butter into a large bowl with both sugars and whisk until the mixture looks glossy and no longer grainy. It should smell like butterscotch already.
- Add the eggs and vanilla:
- Beat in the eggs, the extra yolk, and vanilla until everything is smooth, slightly puffed, and catches the light. This is where the batter starts to feel alive.
- Fold in the dry ingredients:
- Sift the cocoa powder, flour, and salt directly into the bowl, then fold gently with a spatula until just combined. Stop the moment you no longer see dry streaks, overmixing is the enemy here.
- Bake until barely set:
- Scrape the batter into your prepared pan and spread it to the edges, then bake for 22 to 25 minutes. The center should look set but still have a slight wobble underneath, that jiggle becomes fudginess as it cools.
- Cool completely:
- Leave the brownies in the pan on a wire rack and do not rush this part. They need to be fully cool before the ganache touches them or everything slides right off.
- Make the ganache:
- Pile the chopped chocolate into a heatproof bowl, heat the cream in a small saucepan until it just begins to shimmer, and pour it over the chocolate. Wait two minutes, drop in the butter, then stir slowly from the center outward until you have a dark glossy pool.
- Top and decorate:
- Pour the ganache over the cooled brownies and spread it evenly with an offset spatula. Scatter the candy pieces immediately and press them gently so they stick when the ganache firms up.
- Chill and slice:
- Refrigerate for at least 20 minutes so the ganache sets firm enough to cut cleanly. Use the parchment handles to lift the whole block out, then slice with a sharp knife wiped clean between cuts.
 Save to Pinterest
 I brought a tin of these to a potluck last winter and a woman I had never met followed me to the kitchen to ask for the recipe. She told me they reminded her of the ones her mother used to pack in her school bag, and for a moment we were both somewhere else entirely.
Getting the Texture Right
The line between a good brownie and a great one is about thirty seconds of bake time and a willingness to trust the wobble. Pull them when the edges are set but the center still jiggles slightly under your finger. They will continue cooking in the hot pan for several minutes after you take them out, and that residual heat finishes the job perfectly.
Choosing the Right Chocolate
Since the ganache has only three ingredients, the chocolate you pick does all the talking. I usually use a semi sweet bar from the baking aisle, but I have also used chopped dark chocolate with a sixty percent cacao content when I wanted something less sweet. Milk chocolate works too, but it makes the whole thing significantly sweeter, so I would cut back a tablespoon of sugar in the brownie base to balance it.
Storing and Serving
These bars keep remarkably well in the refrigerator for up to five days, and I actually prefer them cold straight from the container. The ganache firms up and the brownie base becomes dense and chewy in a way that feels intentional. Let them sit at room temperature for about fifteen minutes if you want a softer bite.
- Always store them in an airtight container or the edges will dry out and absorb fridge smells.
- If you want to freeze them, wrap individual bars in plastic wrap first, then put them in a freezer bag for up to two months.
- A warmed bar served with a scoop of vanilla ice cream is genuinely one of the best desserts I know how to make.
 Save to Pinterest
 Some recipes are about technique and some are about memory, and this one is the rare creature that manages to be both. Make them once and you will never walk past that checkout line display the same way again.
Questions & Answers
- → How can I tell when the bars are done baking?
-
Look for a thin, slightly crackled top and a center that is set but still moist. A toothpick will come out with a few fudgy crumbs rather than completely clean; avoid overbaking to keep a fudgy texture.
- → What's the best way to get a glossy ganache?
-
Heat the cream until just simmering, pour it over finely chopped chocolate, let it sit for 2 minutes, then stir gently until smooth. Finish with a little butter for extra shine and pour while still warm for an even coat.
- → Can I add mix-ins to the batter?
-
Yes—fold in mini chocolate chips or chopped nuts sparingly at the end to avoid weighing down the batter. About 60 g (1/3 cup) of mix-ins keeps the texture balanced without affecting bake time.
- → How should I store the bars to keep them fresh?
-
Store chilled in an airtight container for up to 5 days. Let bars come to room temperature briefly before serving for softer bite, or serve cold for firmer slices.
- → Can I swap chocolate types for the ganache?
-
Yes. Semi‑sweet works well for balanced flavor, but milk chocolate gives a sweeter finish and dark chocolate creates a deeper, less sweet ganache. Adjust cream amount slightly for desired consistency.
- → Any tips for cutting clean bars?
-
Chill the set ganache thoroughly, then use a sharp knife wiped clean between cuts. Warm the blade under hot water and dry it before slicing for smooth, neat edges.